How It Works (Metal Box)
Read our in-depth instructions below to discover the seven steps to achieving flush outlets!
Note: This page is for RACO metal box FLUSHTEK models (LC 4-4 or lower). For Carlon Plastic Box models, click here.
Step-by-Step Instructions
A more in-depth look at the seven easy steps to achieving integrated outlets with FLUSHTEK

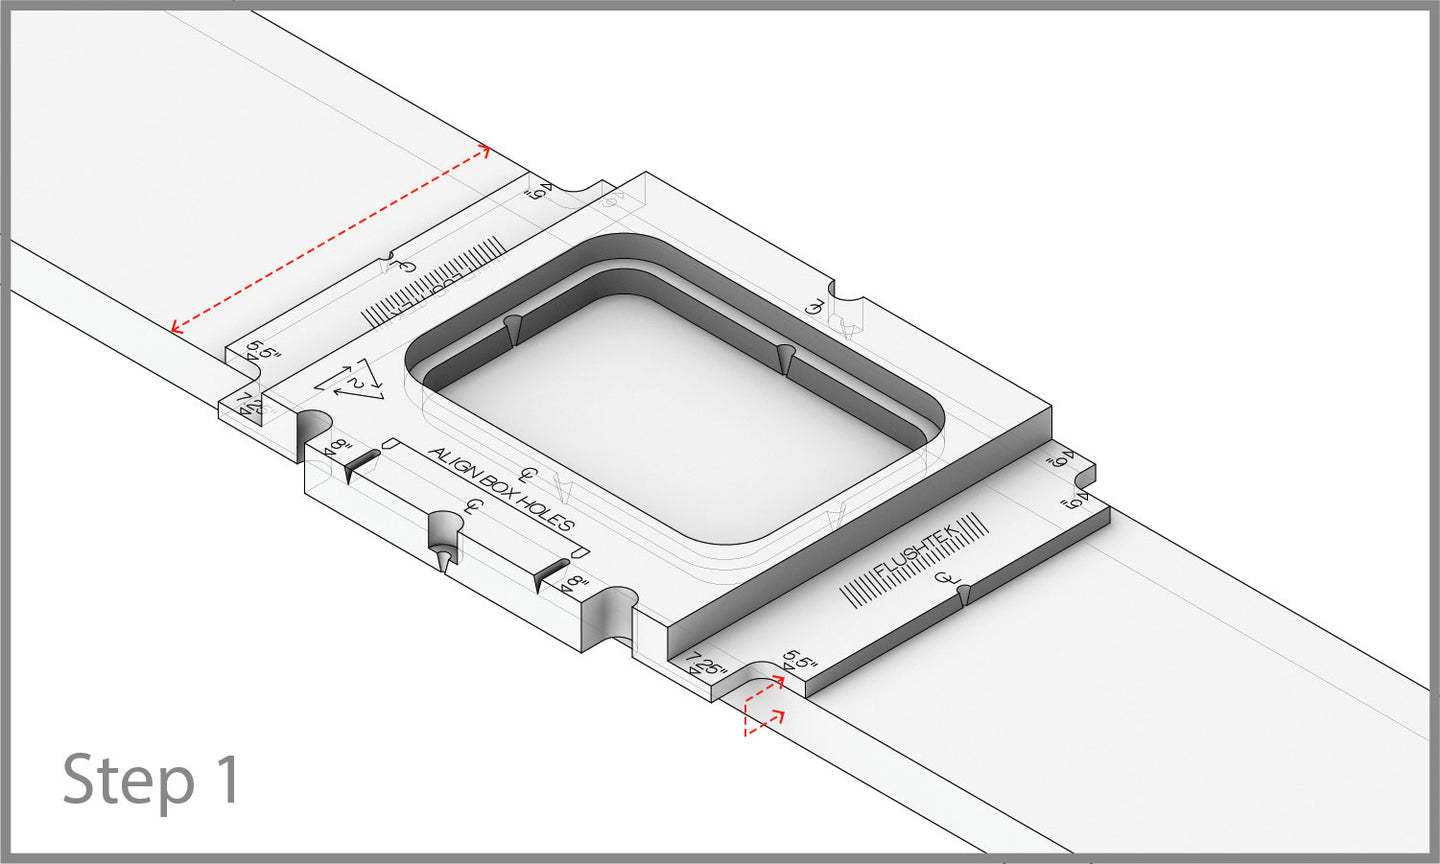
Align & Clamp Template Base
The FLUSHTEK template base makes centering quick and easy with engraved alignment markers for typical trim sizes. Align the edge of the template corresponding to your trim width and it's perfectly centered! Alternatively, use the engraved center makers for large or odd sized pieces. Once the you have the Template Base centered, clamp it to your workpiece.
Note: Trim sizes under 5" are not recommended as the box may not clear the Sillplate Stud. Always double-check your studs and spacing before installing your FLUSHTEK system!

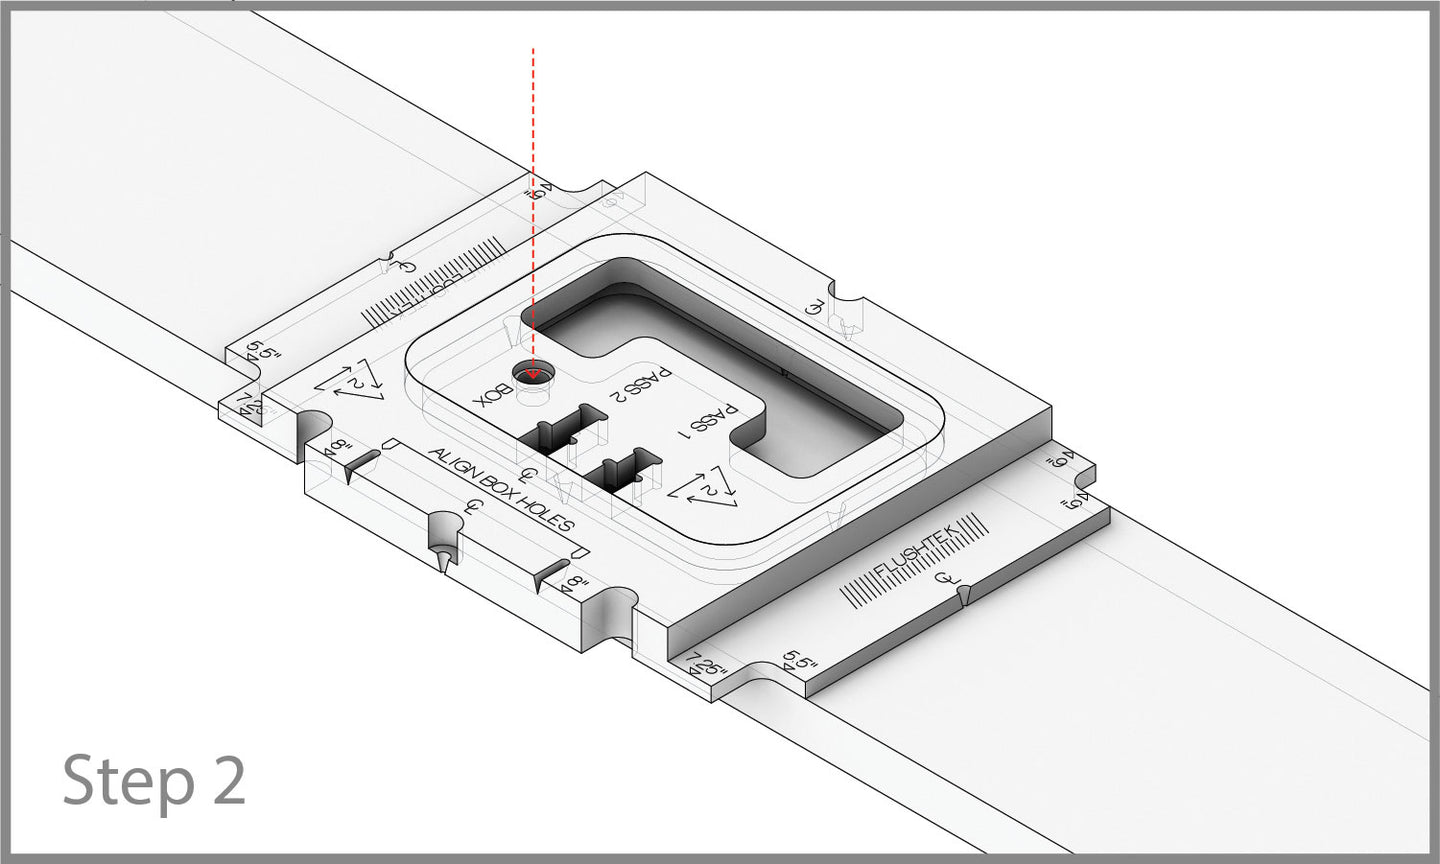
Drill Relief Hole
Insert the Faceplate Template and use a 3/8" bit to bore a relief hole through your workpiece. You'll use this relief hole in Steps 3a, 4a, and 5a to avoid the hassle of plunging or hard-start routing.
Note: FLUSHTEK templates are machined to very precise tolerances, and often require a few "break-in" uses to achieve a comfortable fit between the Template Base and Faceplate Template. If you're having trouble with fit, see our FAQ for more information.
⚠ READ BEFORE ROUTING ⚠
Every FLUSHTEK System Pack includes a new Whiteside 3025 Template Bit. Although an excellent quality tool, it can still be damaged from missue so please follow the manufacturer direction below to prevent overheating, bearing issues, bit slippage, damage, and injury.
⦿ Check bit collar to confirm the bearing is secure and the set screw is tightened against the shaft.
⦿ Start with bit speed low/medium and increase as necessary (ideal speed between 16,000 and 20,000 RPM).
⦿ Do not force the guide-bearing against the template, let it roll gently. Excessive side-pressure will cause burn-out and template damage.
⦿ Let the bit move naturally through the material. Cutting too slowly creates heat from friction, cutting too fast overburdens the bit & router.
⦿ Wait until the bit stops before moving the router between cuts. The moving blades will chip the template and render it unusable!

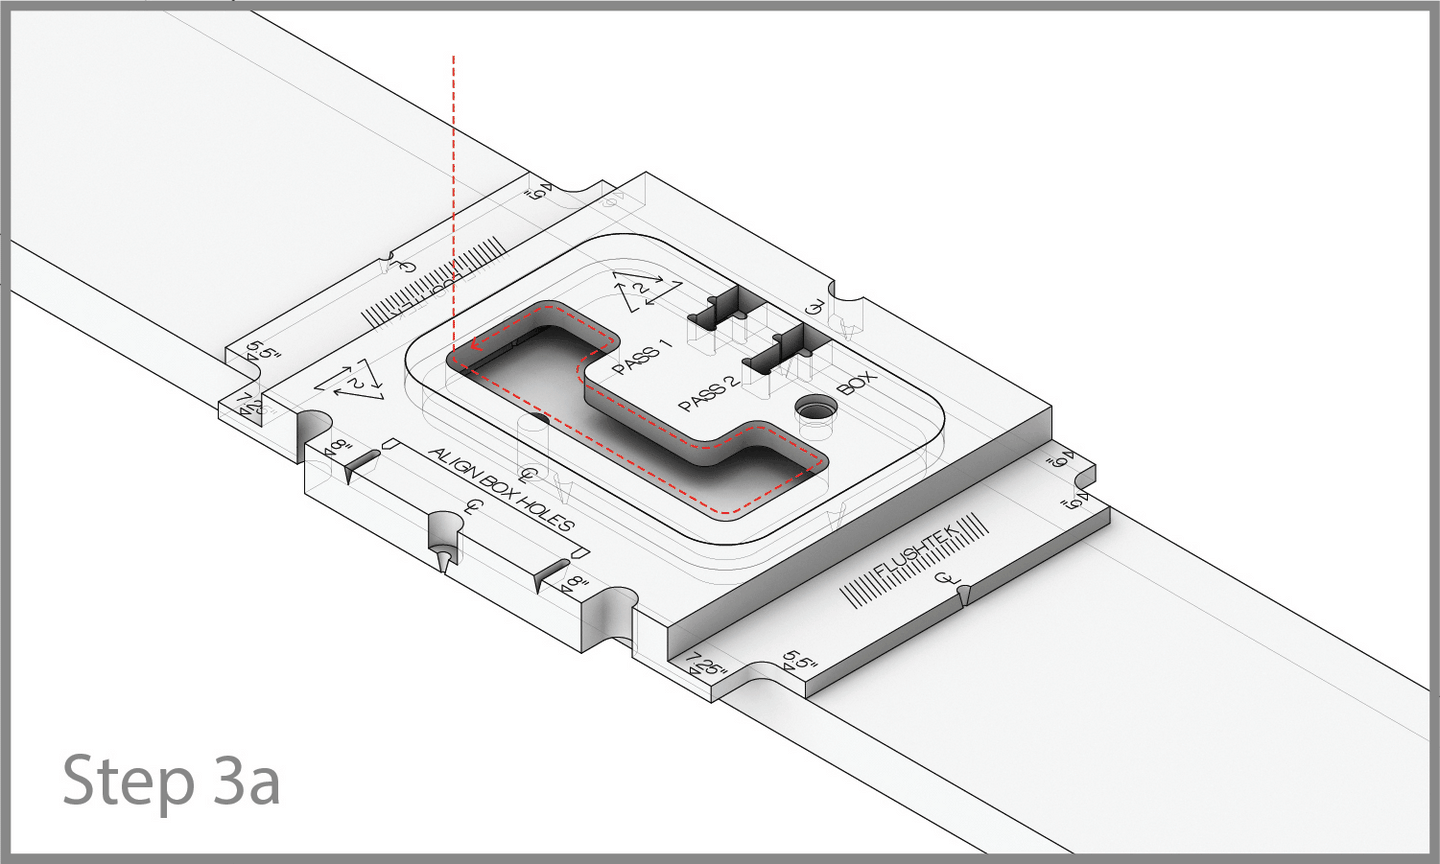
Faceplate Pocket Pass 1
The Faceplate Template has integrated depth guides built into the side. With your router inverted (and unplugged) slide the Template Base over the exposed bit until its end bottoms out in the guide. Raise the foot of the router until it abuts the template and your depth is set!
With the depth set, lock the Faceplate Template into place with the relief hole revealed. Place your router overtop (with the bit in the relief hole) and begin routing. Once you've routed the outline and cleared the material within the profile, flip the template and repeat. You'll be left with the outline of your FLUSHTEK Recess!

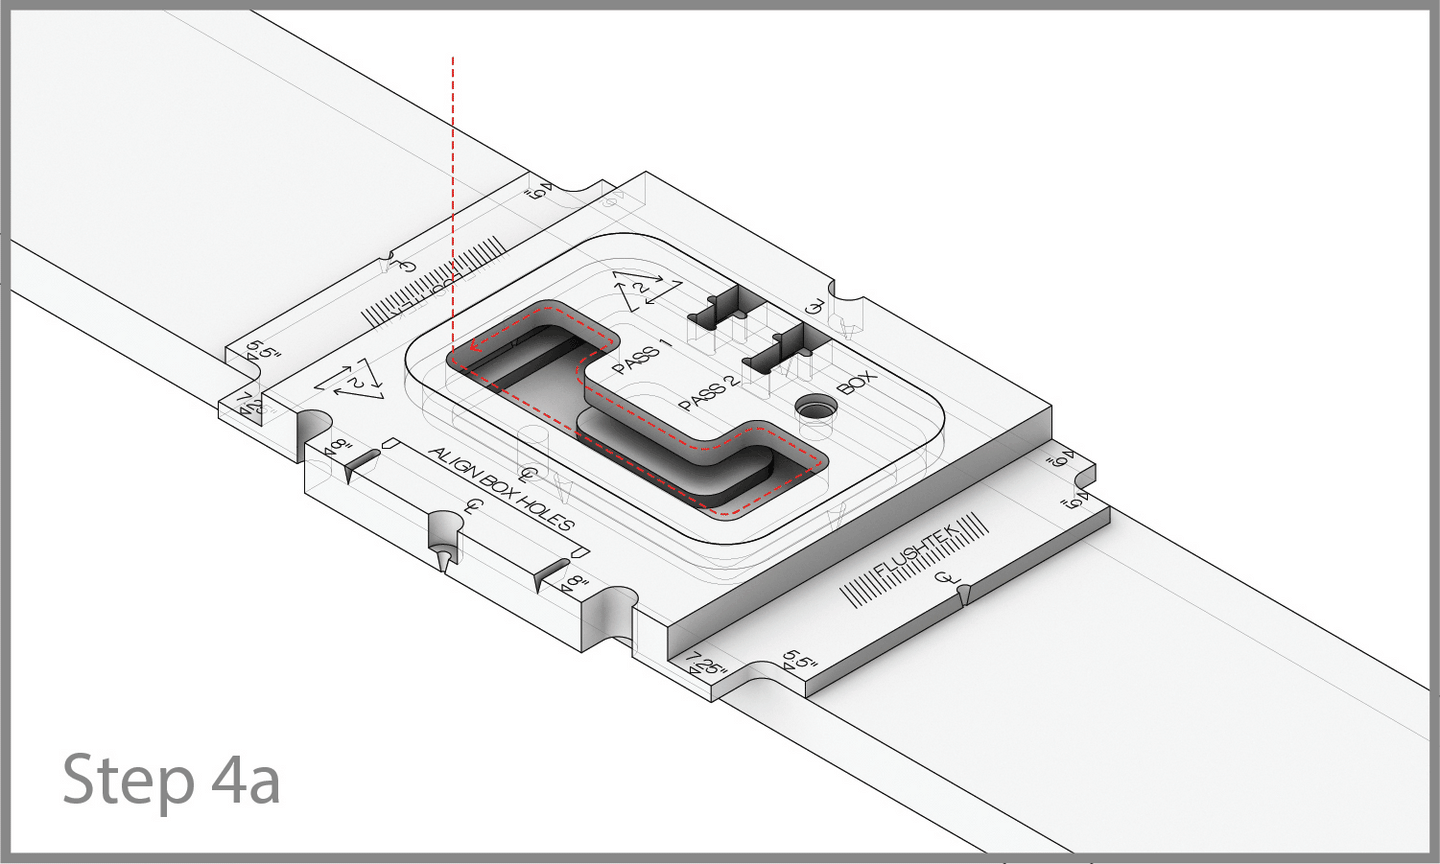
Faceplate Pocket Pass 2
Align your router bit to the "PASS 2" depth (unplug before handling the bit) and rout along the template as described in Step 3 to produce the full depth recess.


Cutout for Electrical Box
Once you've finished cutting the faceplate recess, remove the Template Base and Faceplate Template. Drop the Box Template into the exposed recess.
Starting with your bit in the relief hole from Step 2, and using the same "PASS 2" bit depth, rout around the inside of the Box Template to create a cutout for your electrical box. Be aware, this pass may require a different RPM and feed rate, as you'll be cutting more material with one pass. Take your time to complete the cut and clean up the edges.
Does your box template and resulting cutout look different than the image adjacent? If so, you should probably be following the 4-5 How To Guide.


Cutting Complete!
Remove the FLUSHTEK Box Template and admire! You now have a perfectly centered recess for the Lutron receptacle of your choice.
Drop your FLUSHTEK-approved box into the cutout and use the engraved markers on the Template Base to center the outlet anchor holes. Align the Template base to your centerlines and take your time to align the box holes as evenly as possible. This step is important, as these holes will set the position of your outlet.
Once you've centered the box, pre-drill and install it using miter head M8 wood screws.


Install Outlet and Box
Your base is now ready for installation! Locally remove drywall to accommodate the box and clamps then pull the appropriate cable through to connect your receptacle.
Mount your trim to the wall and anchor with recessed trim screws to the studs on either side of the outlet. Install your Lutron outlet as you would normally. Your FLUSHTEK integrated outlet is complete!